Asus-X407-no-display

How to repair Asus X407 no display

Asus X$07 certainly is an exciting budget contender. In addition to its elegant design, thin and light frame, and HDD+SSD combo, X407 is extremely portable and weighs just 1,5 lbs. It is pretty common to face no display problems while using an Asus laptop for longer. You can open your ASUS laptop computer yourself if you have been experiencing screen problems and do not have the time or money to take it to a repair shop. 

There is a possibility that two connections can cause no display problem for your Asus laptop. Firstly, there is the inverter, the small rectangular chip that transfers power to the screen, and secondly, there is the actual screen cable. Let’s look at the practical way to repair the Asus x407 with no display. 

How to repair Asus X407 no display

Step 1

The first thing you need to do is to turn off your ASUS laptop and unplug the power cable. Now, you have to close the display and turn the unit over.

Step 2

The next step is to unscrew the back of the X407 laptop. Now carefully move the top cover. Make sure you first remove the motherboard and touch flex first from the motherboard. 

Step 3

It exposes all the screws on the plastic bezel (frame) surrounding the screen. Using the screwdriver, you can remove the bezel surrounding the screen.

Step 4

To separate the bezel from the screen, gently pry the corners and sides of the screen.

Step 5

Move the screen away from the back display panel by tilting it slightly forward. Notice the thick black screen cable on the back of the screen.

Step 6

If the screen cable is covered with tape, remove it and ensure it is securely attached to the port. Ensure it is securely plugged in by unplugging it and plugging it back in. Your attention should be directed to the rectangular inverter board mounted on the back of the screen if this does not solve the problem. The inverter should have two cables connected at either end.

Step 7

The cables should be plugged securely into the ports at either end of the inverter. Unplug and replug them if they are not secured. If there is a problem with your screen connection, this should fix it.

Tips: You may experience a black screen after installing a new program or updating your computer’s operating system. These changes may not be compatible with the operating system and cause this issue. If you wish to revert your laptop to a previous state before these changes have been made, you should perform a system restore.

Conclusion

I hope the article will help you to know how to fix your Asus X407 laptop. If you have no previous experience with dissembling a laptop, then you can come to our service center to fix the problem. 

Please note that the guideline instructions provided may not always apply to the symptoms your computer is experiencing. Sometimes, symptoms or behavior can be the same, but the underlying reason or fault can be completely different.

The fastest way we can assist customers is by bringing computers to our workshop, where technicians have the tools to diagnose faults accurately. After checks, if parts are found to be faulty or damaged, we proceed to replace them with high-quality original parts.

No appointments are required; you can drop off your computer at our workshop during working hours.

If you have more queries about our laptop repair and upgrade services, please feel free to contact us at 020 7018 7490 or email us at contact@pcfixlondon.com

Asus-Vivobook-Stuck-in-Bios

You may wonder what to do if you’ve recently purchased an Asus Vivobook laptop and the BIOS screen is stuck. There are a few simple steps that you can follow to repair your computer. It will help you to install a new OS on your system. Let’s discuss how to repair Asus Vivobook stuck in Bios.

How To Repair Asus Vivobook Stuck in Bios?

First method 

The first step is to remove the power cord from the laptop and open it. Press and hold the F2 key on your keyboard. A BIOS screen should appear. Hold the power button for at least 15 seconds if you don’t see it. After the BIOS screen appears, you’ll see the BIOS configuration.

If you can’t get through the BIOS screen, the problem may lie in the Windows operating system. It will prevent the PC from booting and keep displaying a locked screen if it is corrupted. The arrow keys will be your best option in this case. Hit the ENTER key to save your changes, then use the arrow keys to navigate the BIOS menu. This simple procedure will restore all data and settings to the original settings and start your laptop with a new operating system. A factory reset may also be beneficial if your computer has a hardware problem, such as a defective hard drive. Now you can install your OS to your system.

Second Method 

A corrupt BIOS or slow hard drive may require you to reset your Asus laptop to its default settings. Before the Asus logo appears, access the Control Panel and press the F9 key. 

● Click on Fully Clean the Drive under the Troubleshoot menu. 

● Restart your Asus laptop once the factory reset has been completed.

● Please be patient, as this will wipe all your saved data.

Third method 

To access your laptop’s basic input and output system, you need a BIOS password. You can reset this password to gain access to the settings, but unauthorized access to the hardware is prohibited. BIOS passwords are set by default at the factory and can be reset anytime.

Step 1: 

You must press the F2 or Esc key while the laptop is on. In the BIOS settings, look for the Administrator Password. You will need to enter the administrator password.

Step 2:

You must need to remember the administration and security password. Click OK after entering the password. Afterward, you can reenter the password to reset the BIOS. 

Step 3: 

Start the boot process by entering the boot menu. To open the Boot Menu, press F10 while restarting your Asus Vivobook. You should use the windows recovery disk to reinstall your OS. You must take the laptop to an authorized service centre if you do not have the recovery disk. You can restore your data with the help of a certified ASUS service team. After completing this process, you can start your laptop. A new version of the OS will then be loaded.

Final Worlds

The article will help you to understand how to repair Asus Vivobook stuck in Bios. It is a simple and ordinary problem people face while using a laptop. If confused, you can come to our repair shop.

Please note that the guideline instructions provided may not always apply to the symptoms your computer is experiencing. Sometimes, symptoms or behavior can be the same, but the underlying reason or fault can be completely different.

The fastest way we can assist customers is by bringing computers to our workshop, where technicians have the tools to diagnose faults accurately. After checks, if parts are found to be faulty or damaged, we proceed to replace them with high-quality original parts.

No appointments are required; you can drop off your computer at our workshop during working hours.

If you have more queries about our laptop repair and upgrade services, please feel free to contact us at 020 7018 7490 or email us at contact@pcfixlondon.com

Asus-Automatic-Repair-Restart-Loop

Got an Asus laptop trapped in a “Preparing Automatic Repairs” loop? It’s frustrating, right? Especially when you need the laptop for things like work, school, or personal tasks. But no worries! There are ways to deal with this pesky issue. In this guide, we’ll show you how. So, let’s dive into fixing your Asus laptop’s “Preparing Automatic Repairs” loop, shall we?

How to Fix an Asus Laptop Stuck on “Preparing Automatic Repairs” Loop

Step 1: Understand the Issue

Your Asus laptop may get hung up on “Preparing Automatic Repairs.” This generally means trouble with the Windows system. It could come from bad system files, issues with software, or a hard drive on the blink.

Step 2: Perform a Power Cycle

This might fix the issue. Here’s how you do it:

  • First, switch off your laptop.
  • Then, remove the power adapter and battery (only if it’s removable).
  • Next, press the power button for 15-20 seconds. This removes any leftover power.
  • Now, place the battery back (if it’s removable) and plug in the power adapter.
  • Finally, turn your laptop on and see if it starts up like usual.

Step 3: Start up in Safe Mode

Safe Mode uses fewer drivers and services, which can help find and fix startup problems.

  • Switch on your Asus laptop.
  • When you see the Asus logo, keep pressing F8 until you see the Advanced Boot Options menu.
  • Use the arrow keys to choose “Safe Mode” then press Enter.
  • Once you are in Safe Mode, go to “Control Panel” > “System and Security” > “Administrative Tools” > “System Configuration”.
  • Open the System Configuration window, find the “Boot” tab and deselect “Safe boot”.
  • Click “Apply” then “OK” to save what you’ve done.
  • Reboot your laptop and check if it now starts normally.

Step 4: Initiate System Restore

System Restore enables you to bring your laptop’s system settings and files back to an earlier point when everything functioned properly.

  • Start the Advanced Boot Options menu (by hitting F8 when booting up).
  • Pick “Fix your computer” and tap Enter.
  • Decide on your keyboard layout and press “Next”.
  • Type in your username and password if asked.
  • Select “System Restore” from the provided options.
  • Observe the on-screen pointers to select a restore point prior to the problem’s origin and proceed with the restoring process.

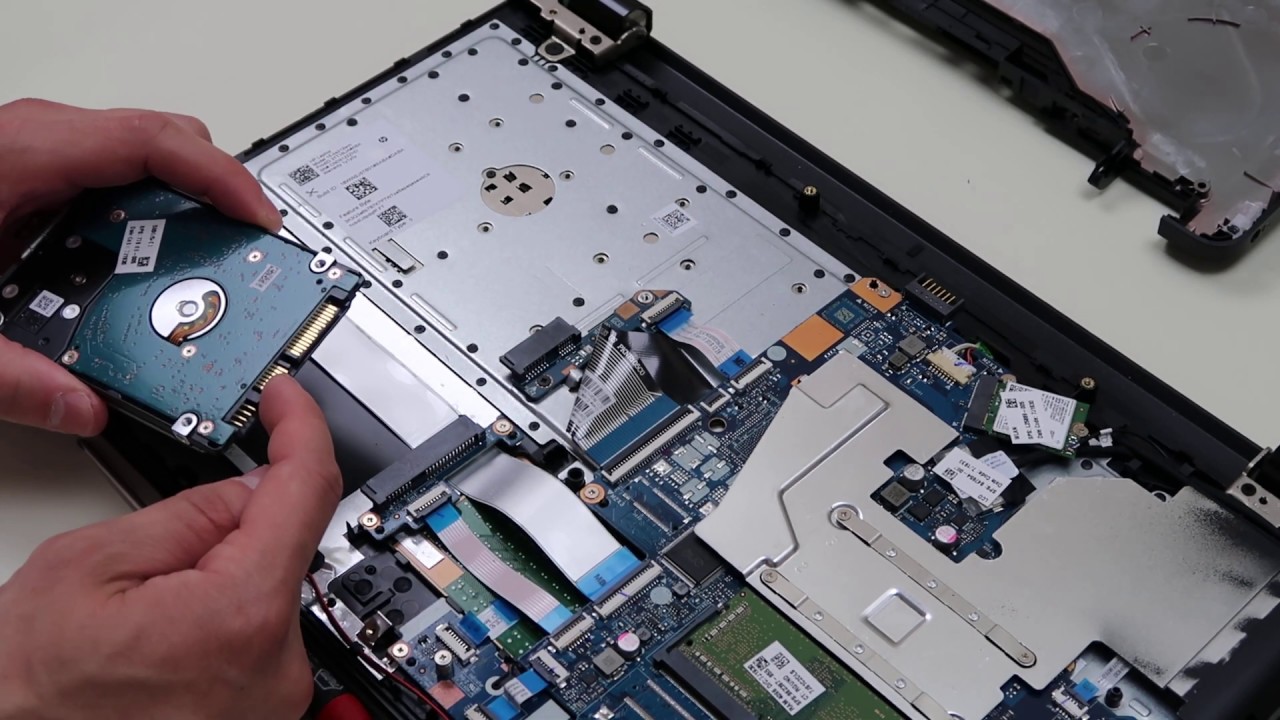
Step 5: Check Your Hard Drive’s Condition

A hard drive going kaput could be behind your Asus laptop’s startup troubles. Here’s how to examine your hard drive’s condition:

  • Switch on into the Advanced Boot Choices menu.
  • Look for “Command Prompt” and choose it.
  • Once the Command Prompt window comes up, key in chkdsk /r /f C: and hit Enter (swap out “C” for your system drive’s letter if it’s not “C”).
  • Let the disk scan finish its course. This might need a bit of patience.
  • When the drive scan wraps up, turn on your laptop again and see if the problem’s still there.

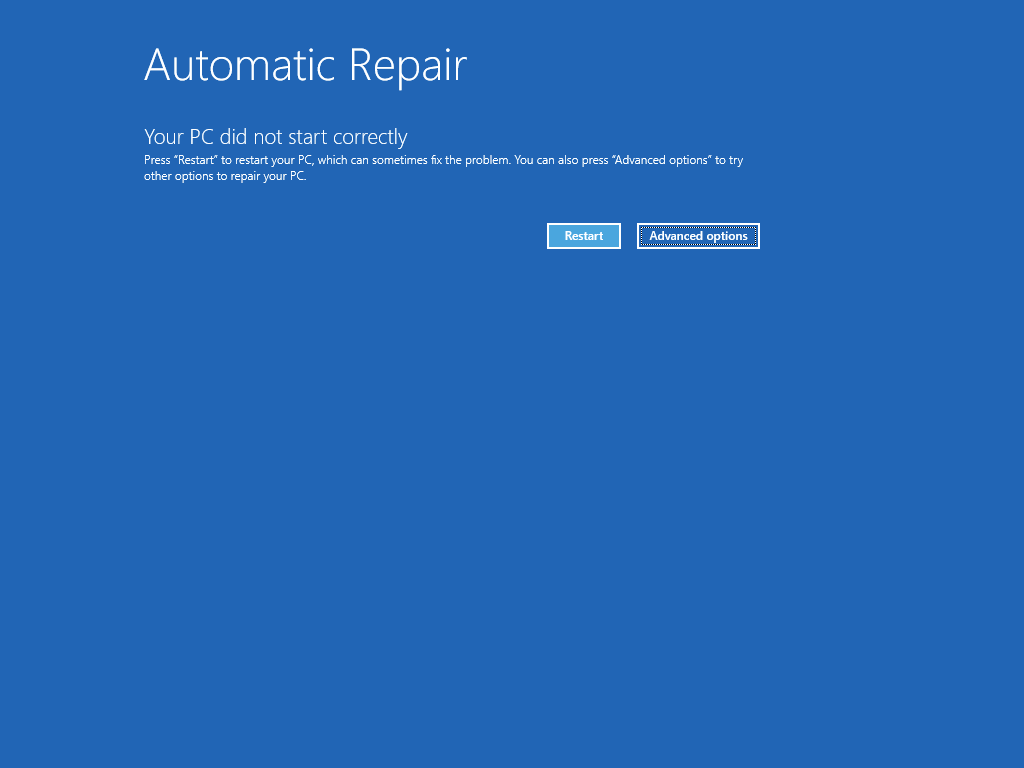
Step 6: Perform Automatic Repair

Not getting far with the previous methods? Automatic Repair could be your solution:

  • Find your way to the Advanced Boot Options menu.
  • Pick “Repair your computer”.
  • Set your keyboard layout and hit “Next”.
  • Add your login details if needed.
  • Choose “Troubleshoot” > “Advance­d options” > “Startup Repair”.
  • Follow the easy instructions on-screen to get your repair underway.

Step 7: Reinstall Windows

If everything else fails, starting over with a fresh Windows install could be your solution. Please, remember to save your crucial data before starting this process.

Step 8: Seek Professional Help

If the problem persists, it might be a hardware issue in your Asus laptop. At this point, it would be wise to reach out to a skilled technician or get in touch with PC Fix London.

Final Words:

It’s a pain when your Asus laptop gets caught in the “Prepping Auto Fixes” loop. Yet, the steps in this guide can help you solve the problem. Don’t forget consistently save your needed data. This way, you’re safe even if your laptop throws a curveball.

Disclaimer:

Please note that the guideline instructions provided may not always apply to the symptoms your computer is experiencing. Sometimes, symptoms or behavior can be the same, but the underlying reason or fault can be completely different.

The fastest way we can assist customers is by bringing computers to our workshop, where technicians have the tools to diagnose faults accurately. After checks, if parts are found to be faulty or damaged, we proceed to replace them with high-quality original parts.

No appointments are required; you can drop off your computer at our workshop during working hours.

If you have more queries about our laptop repair and upgrade services, please feel free to contact us at 020 7018 7490 or email us at contact@pcfixlondon.com

Frequently Asked Questions (FAQs): Asus Preparing Automatic Repair Restart Loop

If you’re experiencing the “Preparing Automatic Repair” restart loop on your Asus computer, it can be frustrating. This issue usually occurs when Windows encounters a problem during startup and attempts to fix it automatically. Here are some frequently asked questions and answers to help you troubleshoot and resolve this problem.

Q: What is the “Preparing Automatic Repair” restart loop on Asus laptops?

A: The “Preparing Automatic Repair” loop is a common issue on Asus laptops where the computer repeatedly attempts to start, fails, and then enters the Automatic Repair process, only to restart again.

Q: Why does my Asus laptop get stuck in the “Preparing Automatic Repair” loop?

A: Several factors can cause this issue, including corrupt system files, software conflicts, hardware problems, or a failed Windows update. It can be challenging to pinpoint the exact cause.

Q: How can I fix the “Preparing Automatic Repair” loop on my Asus laptop?

A: You can try the following solutions:

  • Restart Your Computer: Sometimes, a simple restart can resolve the issue.
  • Boot into Safe Mode: Try booting into Safe Mode and see if you can troubleshoot or uninstall problematic software.
  • Use System Restore: If you have a system restore point created, you can use it to roll back your System to a previous working state.
  • Check for Hardware Issues: Test your hardware components, such as your hard drive or RAM, for errors.
  • Use Windows Recovery Options: Access advanced startup options and try using tools like Startup Repair, Command Prompt, or System Image Recovery.
  • Perform a Reset or Reinstall Windows: As a last resort, you might need to reset your PC or reinstall Windows.

Q: How do I boot into Safe Mode on my Asus laptop?

A: To boot into Safe Mode on an Asus laptop, you can press the F8 key repeatedly during startup or use the Shift + Restart method from the Windows login screen. Alternatively, you can configure Windows to boot into Safe Mode from the “Advanced Startup Options” menu.

Q: What if none of the solutions work, and my Asus laptop is still in the loop?

A: If you’ve tried all the above solutions and the issue persists, it might be a more complex problem. You can contact Asus customer support or a professional technician for further assistance.

Q: How can I prevent the “Preparing Automatic Repair” loop from happening in the future?

A: To prevent this issue, make sure your Windows operating system and drivers are up to date, regularly back up your important data, and be cautious when installing new software or updates.

Q: Will I lose my data when fixing the “Preparing Automatic Repair” loop?

A: It depends on the solution you choose. Some methods may result in data loss, so you must have backups of your important files before attempting any repairs.

Q: How do I access Advanced Startup Options on my Asus laptop?

A: You can access Advanced Startup Options by either holding the Shift key while clicking “Restart” from the Windows login screen or by using a bootable USB drive or recovery disk to access the troubleshooting options.

Q: What is the difference between “Startup Repair” and “System Restore” in the Advanced Startup Options?

A: “Startup Repair” attempts to automatically diagnose and fix issues preventing Windows from starting, while “System Restore” allows you to revert your System to a previous working state. Use “Startup Repair” if you suspect a startup issue and “System Restore” if you believe a recent software change caused the problem.

Q: Can a corrupted hard drive cause the “Preparing Automatic Repair” loop on an Asus laptop?

A: Yes, a failing or corrupted hard drive can cause this issue. You should check your hard drive for errors or consider replacing it if necessary.

Q: Is it possible to turn off the “Preparing Automatic Repair” feature on an Asus laptop?

A: While it’s not recommended to turn off this feature as it helps repair critical startup issues, you can sometimes skip it by forcibly turning off your computer during the boot process. However, this is not a recommended solution and may lead to more significant problems.

Q: Will reinstalling Windows solve the “Preparing Automatic Repair” loop issue on my Asus laptop?

A: Reinstalling Windows is a last-resort solution. It can fix the issue if caused by a severe software problem, but will result in data loss. Make sure to back up your important data before proceeding.

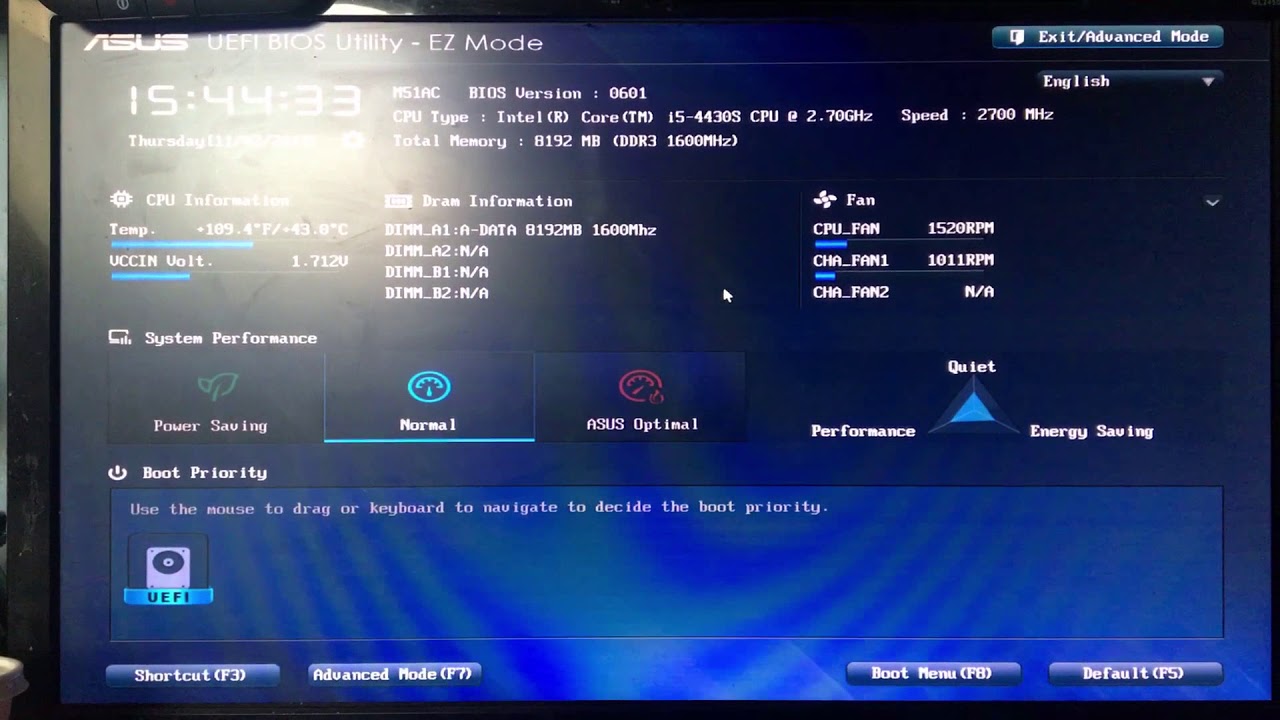
Q: How can I update my Asus laptop’s BIOS to resolve the issue potentially?

A: You can update your BIOS by downloading the latest version from the Asus support website, creating a bootable USB drive, and following the manufacturer’s instructions for updating the BIOS. Be cautious when updating the BIOS, as an incorrect update can lead to further issues.

Q: Is it possible to use system recovery options without losing data during the repair process?

A: Yes, certain system recovery options, such as “System Restore,” can fix the issue without losing personal data. However, more severe repair options like a Windows reinstallation may result in data loss.

Q: Can third-party software or malware trigger the “Preparing Automatic Repair” loop?

A: Yes, third-party software conflicts or malware infections can cause this problem. Booting into Safe Mode and performing a thorough malware scan is a good initial step to address this issue.

Keep in mind that resolving the “Preparing Automatic Repair” loop can be challenging and might require patience and technical knowledge. If you need clarification on any of the troubleshooting steps, it’s wise to seek professional assistance to avoid potential data loss or further complications.

MSI-Laptop-Charging-Port-Repair

Did you know that a loose charging port of your MSI laptop can cause your battery not to charge? This is a common problem with laptops, which you might have faced before. If it’s still under warranty, you can take it to a technician to repair it. But if not, then there are ways you can do it yourself. Here, we will guide you on how to fix the loose charging port of your laptop at home. This guide will also save you money in the long run by doing the repairs yourself instead of buying a new device.

Before doing that, we’ll investigate the cause of the loose laptop charging port. Why is the charging port on my MSI laptop becomes loose?

What causes my MSI charging port to get loose?

The loose laptop charging port can be attributed to a few basic causes. The charging plug being constantly removed and reinserted is the first explanation. Your charging cable gets weak if you keep plugging it in and taking it out.

You must have observed that tiny pins surround the charging connector on your laptop. Your charging port gets loose when the pins are pulled down on it. The laptop then becomes challenging to charge as a result. Your laptop will then repeatedly connect in and out. Because of this, many are concerned about heating a motherboard element.

Your laptop is not adequately charged as a result. And this issue makes you very angry. But the problem is not that there isn’t a fix for this issue. This piece will explain how to restore a loose laptop charger port. The loose laptop power cable can be fixed without additional tools.

Only one needle is needed to solve the laptop charging port. Let’s take a step-by-step approach to fixing it.

How to repair a damaged charging port?

Several things, including a bent pin in the charging port or a physical breakage of the plastic around the port, can cause a loose charging port. This guide will show you how to repair a loose charging port on a laptop.

Step 1: Check the USB ports on the computer to ensure they are tight enough. If they are, then this is probably not your problem, and you should try fixing them instead of your charging port.

Step 2: Open up your laptop and remove all screws from its case. The screws should be visible once you have removed them all.

Step 3: Gently place your fingers underneath the back cover and pry it off its hinges. You may need to use something like a screwdriver for leverage if needed.

Step 4: Find the battery connector cable and disconnect it from the motherboard by pulling it out gently with both hands or using pliers if needed.

Step 5: Remove all screws that hold down any other components inside your laptop’s case, such as hard drives or optical drives, until you can see only one screw left holding everything else in place on this side of the motherboard.

Step 6: Return all of the items to their original locations.

How to handle a broken MSI charging port?

This guide is just for you if the charging cable on your device is broken. Because this is what this study’s information will focus on. You can repair your cracked charging port at home if you carefully understand each instruction.

Only a screwdriver is required to repair the laptop charging port at home. If you don’t already have one, you can purchase one at the nearby electronics store.

● First, take out your batteries.

● After loosening the screw holding the hard disk’s top cover in place, remove the cover.

● Next, remove the hard disk’s screw and the hard disk itself.

● take off the RAM chip that is next to the hard drive.

● At this point, remove all the last screws. Keep in mind that the board is not fastened to anything with screws. Next, take out the laptop.

● Next, take off the back cover.

● Replace the damaged charging port with the new one after removing the old one.

Final Words

We hope this article helps you fix the loose charging port of the laptop. If you want to know more about other errors, you can ask questions in the comment section below. In addition, if you like this post, please rate it with stars and share it on social media to help others find it easily.

Please note that the guideline instructions provided may not always apply to the symptoms your computer is experiencing. Sometimes, symptoms or behavior can be the same, but the underlying reason or fault can be completely different.

The fastest way we can assist customers is by bringing computers to our workshop, where technicians have the tools to diagnose faults accurately. After checks, if parts are found to be faulty or damaged, we proceed to replace them with high-quality original parts.

No appointments are required; you can drop off your computer at our workshop during working hours.

If you have more queries about our laptop repair and upgrade services, please feel free to contact us at 020 7018 7490 or email us at contact@pcfixlondon.com

Laptop Repair

Repairing laptops can be rewarding, but it can also be time-consuming and frustrating if you don’t know what you’re doing. HP laptop repair is different from other laptop repairs because most of the repairs turn into hardware components problems. The repair steps for an HP Pavilion laptop can be really complex, especially if you don’t know where to start or what to do.

Therefore, you must determine whether to disassemble a laptop that requires repair. While trying to remove the keyboard, you accidentally snap it off. This led me to search for a new one, which is how you figure out how to clean and repair HP Pavilion laptops.

Major Preparations

The HP Pavilion Laptop is a great machine for everyday use, but it can get dirty and damaged over time. You should regularly clean and maintain your laptop if you would like to stay in good shape. The following sections describe how to prepare for the cleaning process:

  • Remove dust from fans and discharge airways to enhance airflow and cooling
  • Examine sluggish wireless performance
  • Look at a bad power switch
  • Look into a damaged floppy drive.

Clean the exterior

To clean your HP Pavilion laptop’s exterior, disconnect it from any power sources, including battery packs and wall outlets. Make sure to shut down your PC before cleaning the exterior, or you may damage the computer’s hardware.

Your HP Pavilion laptop’s exterior should be cleaned using a soft cloth that has been wet with water. You can use a mild soap solution if necessary but avoid using strong chemicals like bleach or ammonia because they could discolour or damage your computer’s outer casing.

Clean the keyboard

Clean your laptop’s keyboard with a soft cloth. Just use some bit of rubbing alcohol to clear up any spills you may have made on your keyboard. Useless liquids like water can harm the keys, so avoid using them.

If your keyboard has stopped working correctly, check the ribbon cable in the centre of your keyboard. Look at the back of your computer and locate the small plastic piece that holds down one end of the cable. Remove this piece using a flathead screwdriver or other similar tool, then lift up on the cable gently until it comes out of its connector on top of your motherboard. If you’re still having problems after cleaning out any debris from beneath each key, consider replacing the entire keyboard assembly if possible.

Clean the display and its bezel

Cleaning your HP Pavilion Laptop display is a good way to keep it looking new. You can use a soft cloth, but if you want to get the best results, you should use a microfiber cloth or an alcohol-free glass cleaner.

You can also clean the bezel around the screen by wiping it with a damp towel, but you must be careful not to get any moisture into the vents or keyboard.

  • Remove the screen from the laptop.
  • Use a soft cloth and non-abrasive liquid cleaner to clean the display. Clean paper towels or cloths should be used to dry after rinsing with water.
  • To clean up surrounding your laptop’s microphone grill close to the hinge, dampen a cotton swab with alcohol.

Clean the memory module cover

Before you start, make sure that your laptop is completely shut down and turned off. If you have any important data on the computer, save it to an external hard drive or USB drive before you begin cleaning.

To clean your HP Pavilion laptop:

1) Unplug the power cord from the AC outlet and remove any external devices, such as a mouse or an external keyboard.

2) Turn over your laptop and open up the battery compartment cover by sliding it out toward the rear of the computer.

3) Remove each battery pack by lifting its handle and pulling it straight out of its slot at the bottom of your laptop. Set aside for later use if desired.

4) Remove any screws that are holding down the metal plate covering your memory module slots. Use a Phillips screwdriver if necessary to remove them from underneath your computer’s base plate.

5) Carefully lift up this metal.

Clean the cooling vents and fan

Your HP Pavilion laptop may be experiencing issues as a result of warming. Overheating can cause system lockups and slowdowns, which is why it’s important to keep your laptop’s internal fans clear of dust and debris.

To clean your HP Pavilion’s cooling vents and fan, first shut down the laptop and remove its battery if possible. If you have an external monitor connected, disconnect it as well. Next, use a can of compressed air or a vacuum cleaner to blow out all of the dust from inside the vents on both sides of the machine.

If anything is preventing ventilation, use a screwdriver to eliminate it. Then reconnect everything in reverse order, so you don’t accidentally damage anything while putting things back together again.

Repair or replace the hard drive

If your HP Pavilion laptop is running slow, it may be due to a corrupt hard drive. A corrupted hard drive can cause all sorts of issues, from crashing the computer to making it run like a snail. Luckily, you can repair or replace the hard drive yourself without having to pay for expensive repairs from HP.

Remove the screws owning the panel encompassing the hard drive from your laptop by opening it up. Remove that panel and disconnect any cables attached to the hard drive. Put everything back together and boot up your computer to test it out.

Repair or replace the memory modules (RAM)

The memory module is an integrated circuit that stores information. Memory modules are sometimes called RAM (random access memory) and are used in computers to store information for short periods of time. The far more popular kind of RAM is DRAM (dynamic RAM), which needs a steady stream of energy to keep data current.

If your HP Pavilion laptop is running slowly, the first thing you should do is check whether it has enough RAM. If your laptop has less than 1 GB of memory, it will run more slowly than one with 2 GB or more, even if both have the same processor speed.

You can upgrade your HP Pavilion laptop’s memory to help improve its performance. 

Here’s how:

1. Shut down your laptop and disconnect any external devices, such as printers or scanners, if they aren’t permanently attached to the computer’s ports.

2. Make sure you inspect the underside of your HP Pavilion laptop.

3. Remove any screws holding down the cover on which your mouse pad resides by using a screwdriver or other flathead screwdriver to pry open the case from its outer edges.

Final Words

We sincerely hope that you’ve found this guide to be helpful. It’s not always easy to find information regarding laptops, and we truly believe that HP Pavilion owners can benefit from having a go-to resource for all things related to maintenance, cleaning, and repairing. Hopefully, you’ll find the solutions you’re looking for here.

Please note that the guideline instructions provided may not always apply to the symptoms your computer is experiencing. Sometimes, symptoms or behavior can be the same, but the underlying reason or fault can be completely different.

The fastest way we can assist customers is by bringing computers to our workshop, where technicians have the tools to diagnose faults accurately. After checks, if parts are found to be faulty or damaged, we proceed to replace them with high-quality original parts.

No appointments are required; you can drop off your computer at our workshop during working hours.

If you have more queries about our laptop repair and upgrade services, please feel free to contact us at 020 7018 7490 or email us at contact@pcfixlondon.com

restore hp laptop performance

Restore HP Laptop Performance:

As HP laptops are not much less in performance than any other laptop, you can face the same issues as you would with Mac or Windows computers: slow running speed and freezing. Some users have reported their HP systems taking hours to boot.

HP Laptops can suffer from performance problems as HP’s tend to be connected directly to cheap LCD screens. This is great for saving money but causes the laptop to struggle. In this short article, we’ll introduce you to some quick tips on restoring the performance of your laptop.

Why is my HP laptop running so slowly?

As everyone is aware, HP computers slow down over time. Your laptop could appear brand new or flawless when you use it for the first time, with no freezes, lags, or hangs. The first time you use your laptop, you might imagine that you won’t be playing games or doing photo or video editing. You believe you’ll maintain your laptop tidy, or you need to ensure it’s quick enough to complete any work.

Numerous factors contribute to HP laptops’ shortcomings in specific areas. These are some of the typical causes:

  • Running too many apps at once
  • Running out of disk space
  • Software problems
  • Virus or malware attacks
  • Hardware problems
  • Overheating and laptop burnout, and inaccurate or out-of-date data

5 Effective Ways To Fix HP Laptop Performance

There are many reasons your HP Laptop can slow down, but you don’t need to worry about it. Here are some simple steps to boost your HP laptop performance.

1. Wait till the Windows 10 upgrade is finished.

If your HP laptop is performing slowly after upgrading to Windows 10, don’t panic. You can fix it with a few quick steps. Go to Settings > Update & security > Windows Update and click Check for updates. Wait for the update to complete. This may take some time, so be patient. After installing the update, restart your HP laptop to apply the changes.

2. Remove Auto-Run Services or Programs 

If you’re looking for better performance and more free space on your hard drive, take a look at this guide to removing auto-run services and programs.

  • Right-click on the Start button and select Control Panel.
  • Click on System and Security and then Administrative Tools.
  • Double-click on Services.
  • Scroll down until you find a service called “AutoRuns”, right-click on it, and choose Stop. Now go back to the Services window and click ‘Start’ under AutoRuns to start it again.

3. Look for malware and viruses.

Malware and viruses are common problems for all PCs because they affect laptop performance. You must discover an antivirus program because malware and antivirus software can result in significant problems such as system crashes, performance degradation, catastrophic data loss, and other problems.

4. Upgrade RAM

Random-access memory is referred to as RAM. With a laptop, You can play games and keep other extensive data thanks to this memory storage. Your HP laptop will operate very poorly if it has insufficient RAM since it cannot support running too many applications simultaneously.

When a computer has essential data, boosting RAM might make it run faster. The best way to speed up your HP laptop is by adding more RAM (memory), mainly if you use it for gaming or video/photo retouching. Check “Performance” and “Memory” in Task Manager to view the specific RAM status.

5. Make Windows Register work.

Additionally, there is the idea of registry mistakes, which greatly slow down your laptop. This issue occurs under these circumstances whenever you install or remove any third-party programs. The register stores details on errors like this. Your computer will perform very slowly due to this, and occasionally it won’t even be able to shut down.

Some steps can help you to fix this problem and get rid of the errors which cause performance issues in your laptop.

  • Open the task manager by pressing the CTRL+ALT+DEL keys together and then click on the Start Task Manager button.
  • Now, click on the File > New Task (Run) option in the top right corner of the Task Manager window, type Regedit in the Run dialogue box, and tap the Ok key to open the Registry Editor window.
  • In Registry Editor window navigate here: HKLM\SYSTEM\CurrentControlSet\Control\Session Manager\Memory Management\PagingFiles
  • Select the PagingFiles Registry value from the left pane and double-click on it from the right pane to open its properties box.

Final Words

These tips are a little different, but hopefully, they will help you restore the performance of your HP laptop. If there’s anything specific that you’d like to see improved on, let us know, and we’ll consider it when making our suggestions for future posts. Still you can’t improve the performances of HP laptop, bring to us to fix your HP laptop issues and improve the performance.

Please note that the guideline instructions provided may not always apply to the symptoms your computer is experiencing. Sometimes, symptoms or behavior can be the same, but the underlying reason or fault can be completely different.

The fastest way we can assist customers is by bringing computers to our workshop, where technicians have the tools to diagnose faults accurately. After checks, if parts are found to be faulty or damaged, we proceed to replace them with high-quality original parts.

No appointments are required; you can drop off your computer at our workshop during working hours.

If you have more queries about our laptop repair and upgrade services, please feel free to contact us at 020 7018 7490 or email us at contact@pcfixlondon.com

HP Laptop Hard Drive Repair

Hard drive problems in HP laptops can be solved with a cascade of different methods. The methods are simple, and you only need some knowledge of how to do it and, of course, a willingness to learn more about it. It’s just as easy to fix hard drive errors in HP laptops as installing software on your computer. So if you are prepared for a little bit of tinkering with your old laptop, read on and start learning how to fix this annoying problem. We did some research and found out how to quickly resolve the hard drive problem in HP laptops.

How do hard drives breakdowns?

Hard drives are the most common cause of data loss and the most frequent source of problems for PC owners. A variety of issues can cause hard drive breakdowns, from software malfunctions to mechanical failures.

The most common cause of hard drive failures is mechanical problems. The heads on the hard drive jump around and crash into each other or get stuck in the platters. This causes data loss and makes your computer unresponsive.

Another common cause of hard drive breakdowns is damage to the circuit board inside your laptop or desktop computer. When moisture or dust gets into your computer, it short circuits the hard drive, making it unreadable by your computer’s operating system.

Take a look to fix HP Laptop’s Hard drive in several ways.

The HP Laptop Hard Disk Error can be fixed in several ways, which are:

  • You can recover the factory settings by doing a hard reset on your HP laptop.
  • Verify the BIOS reset theory’s effectiveness.
  • Try to install the fast or extensive version of HP Hardware Diagnostics, and you can check the hard drive on a different machine.
  • Try wiping the hard drive.
  • To retrieve the information from the broken or destroyed Hard Drive, you need a specialized tool.
  • Study the techniques in depth to see if they can be used to fix the issue.

How to Fix Hard Disk Failure on an HP Laptop

Fixing hard disk failure is not a difficult task. However, it can be a challenge if you are not familiar with computers and don’t have the right tools or knowledge. If your HP laptop shows hard disk failure, you can try the following steps to fix this problem.

Step 1: Reset the BIOS to its default options

The performance procedures listed below will assist you in resolving the HP Laptop Hard Disk Failure problem.

  • Turn off your computer and give it a 10-second delay.
  • Switch on your laptop, then press F10 to access BIOS.
  • To load “BIOS Setup Default Settings,” press F9 on the BIOS screen.
  • Press F10 to save the adjustments, then quit BIOS.
  • Press “Enter” after selecting “Yes” from the prompt.

Step 2: Reset Your Hard Drive

Your hard drive will be completely erased if you perform a hard reset. In order to rebuild the software link between Hardware and BIOS and correct the issue, the standard capability will be recovered. To fix the HP laptop hard disk, take the instructions listed below:

  • Unplug the power cable first.
  • Next, you must unplug all USB and peripheral devices.
  • Next, you must take the battery out. If your laptop’s battery is internal, remove it by opening the shell.
  • To remove the leftover current, click and hold the power button for a short period of time.
  • Finally, reattach the battery and start your laptop.

Step 3: Hard Drive Analysis

If your machine runs Windows XP, the SATA ports are likely not downloaded, which is why it cannot boot and is locked on the problem. Therefore, installing and checking the SATA driver is the first step in fixing the problem.

Additionally, you can take your computer’s hard drive out and use a SATA to USB converter to attach it to another computer. If your hard disk is still undetected, it will likely be destroyed.

Step 4: Activate HP Hardware Diagnostics

There are six separate exams in “Quick Mode,” each taking 1-3 minutes to complete. “Extensive Mode” takes longer than 2 hours to do the same 6 tests. To fix the Hard Disk issue on an HP laptop, here’s what to do:

  • Connect the AC adapter first. Verify that the machine has no other USB devices connected.
  • To switch off the device, if it is on, click and hold the power button for 5 seconds.
  • After the system starts, keep hitting ESC four or five times.
  • The screen will display menu options. Press F2 now.
  • Select the “Components Test” option from the “HP Hardware Diagnostics” menu.
  • To select the hard disk, press the arrow keys.
  • Click “Run Once” after choosing the Quick Test selection in this step
  • Permit the test to end. Select “Test All Hard Drives” if you have more than one hard drive.

Step 5: Wizard with High Performance

If you still have trouble fixing the problem, you should consider employing a specialized tool. This comprehensive solution bundle will enable you to resolve the HP Laptop Hard Disk Failure problem quickly.

  • The information wiped from the hard drive can all be recovered with this hard disk treatment option.
  • This software enables you to restore information from several different Hard Drives. It quickly recovers your data while maintaining the consistency of the formatting.
  • The software is relatively self-explanatory, so utilizing it is not difficult.

Wrap Up

Hard disk failure is a very common problem among HP laptops. Millions of users report these failure issues, and people get disheartened because they think it is a big deal. And if the hard drive problems have already developed in your HP laptop, then you need to take an interest in this article and carry out the repairs as instructed by us. Use our steps, and you’ll be able to repair many common faults with the hard disk on your laptop. If you can’t able to fix this issue, you can reach out or bring your HP latop for repair.

Please note that the guideline instructions provided may not always apply to the symptoms your computer is experiencing. Sometimes, symptoms or behavior can be the same, but the underlying reason or fault can be completely different.

The fastest way we can assist customers is by bringing computers to our workshop, where technicians have the tools to diagnose faults accurately. After checks, if parts are found to be faulty or damaged, we proceed to replace them with high-quality original parts.

No appointments are required; you can drop off your computer at our workshop during working hours.

If you have more queries about our laptop repair and upgrade services, please feel free to contact us at 020 7018 7490 or email us at contact@pcfixlondon.com