There are many reasons or cause for laptop screen showing complete dark black screen, vertical, horizontal lines some black patches not all but many of common reasons are listed below and some solitons and testing for it. In this guide we will go through symptoms how they looks like when damaged, and then few test which can be done at home and also discuss of possible reasons of damage.
This not only helps identify issue but also gives you some method to do some testing at home to confirm identify fault but also help to maintain and avoid future damage reason being when you know what could have caused damage it can be avoided next time.
Common Signs of a Damaged Laptop Screen
Horizontal Vertical lines on screen.
Visual sign of horizontal and coloured lines across screen interfering with normal function.
Black Patches
This one very common also, black patches specially very local to area of damage or place of impact / pressure
intermittently on and off flashing
Screen flashing or intermittently going on and off
Dead Pixels or Liquid crystal leakage .
Area of damage showing some patch discoloured dots, black patches, in some cases looks like coloured liquid leakage on screen
Complete Dark or White Out Screen
A complete dark screen can also be sign of broken screen but that can be tricky reason being this can also be a sign of computer not booting up posting at all or fault on graphics / VGA cards, ram memory fault or other hardware issues
Common Reasons of Broken HP Laptop Screen
Although there are many reasons computer may have broken or damaged laptop screen i will try to provide most common we see on daily basis. This will help you understand reasons how screen gets damaged and when you know reason of damage it becomes easier to take care of it and avoid damage in future.
1. Pressure or Physical Impact Damage
This is very common almost on daily basis client would walk in with screen not working when asked about it they would confirm they have had accidental drop, a impact damage like drop from a height or bumped against wall or hard surface.
2. Defective backlight
Over time screen panel do deteriorate specially LCDs they have backlight which does have some thousands of hours. At some point they may partially go dim or dark in some areas and at some time they may go complete dark resulting in complete dark screen with no visuals at all
3. Pressure Damage when opening lid
Sometimes during opening of the lid user may have thump or finger put inside laptop screen causing pressure on lcd panel resulting in black patch / crystal liquid leakage signs
4. Corrupt or Outdated Drivers
Rarely it can be Incorrect or outdated or a automatic forced update from windows drivers resulting in screen malfunction for example flashing display or orientation change .
5. Damage due to broken hinge
Broken hinge, body frame during opening and closing of lid can cause unintended pressure on screen panel or screen cable which runs from back of laptop screen connecting to mainboard through hinge cavities resulting in either crack, pressure damage black patches or complete dark screen in case of broken or damaged screen cable.
Some cases screen cable also comes loose because of frame not aligned with body correctly casing stress to screen cable.
6. Electronic circuit failure
Addition to glass, pixels, backlight damage. Laptop screens also suffers from electronic panels / circuit which manages data signals from GPU / Mainboard also handle power section like back lights which illuminate leds/ backlights this section have set of capacitors for filtering and power support function. Usually these panels are build just under the laptop screen or behind on thin strip of circuit.
Step-by-Step Methods to Identify Screen Lines on HP Laptops
Method 1: Connect with External screen via HDMI, VGA, Thunderbolt Port
- Connect your laptop to an external display if laptop functions fine on external display it is highly likely internal laptop screen is broken. It is important to note it is now always the case sometimes dedicated graphics can be fault and when connected though thunderbolt it displays on external screen via Basic intel graphics which means internal screen is fine but fault with GPU it can be confusing so its best to get technical help.
- If lines / no display appear on both screens internal and external, the issue is likely graphics- or mainboard related.
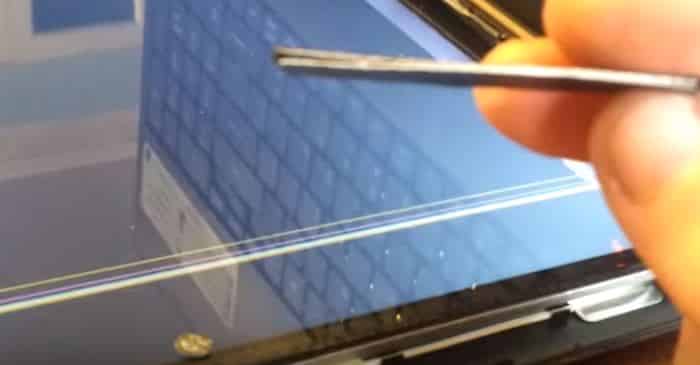
Method 2: Check the LCD Cable connection mainboard and screen side
This fix requires opening the laptop: only recommended for advance users or technicians
- Importantly disconnect internal battery and power cut off before operating on laptop. Double check if cable is seated properly in socket making good contact on both side mainboard and screen side.
- Look for visible damage. If the cable is worn out, squeezed or pinched, it may need replacement.
Note: If unsure, let professionals handle internal component repairs.
Method 3: Update or Reinstall Drivers
Outdated or corrupt drivers can affect display output.
This method will only work if laptop is works on external screen via HDMI, Thunderbolt, VGA port
Start with external monitor open : https://support.hp.com/gb-en/drivers click on update drivers.
Method 4: Use Windows Display Trouble-shooter
This method will only work if laptop is works on external screen via HDMI, Thunderbolt, VGA port
Open windows troubleshoot from start Menu, and choose options display issues.
Method 5: Perform a Clean Boot – Reset PC restores original drivers
This method will only work if laptop is works on external screen via HDMI, Thunderbolt, VGA port. Also make backup before complete reboot.
Type in start menu RESET: This should bring reset option :
Warning : If you reset option with remove user data it is important make backup before reset.
You can also choose RESET Option with keeping user data but still in this case you will loose all application / programmes but computer will be reset to factory default original drivers.
Tips to prevent screen damage also extend screen life.
While opening lid do not put finger or pressure on screen it self. Always use frame or lid to handle screen opening.
Keep power saving sleep mode on while not in use screen can switch off makes life longer on backlight avoiding backlight exhaustion.
Try open always from middle of LID and not put too much pressure on one side of lid which can cause damage to hinge which in end can cause damage to screen cable or screen it self always try open and close from middle of lid so pressure is distributed equally on both side of hinge.
Laptop case with cushion can help in case of impact damage or fall.
Avoid any contact with liquid.
When Should You Seek Professional Repair?
If you have tried all the above or not feel confident to operate on it. Then it is time to seek expert help
We accepts walk-ins no appointment service in Central London click on link for dedicate service page for screen repair
About Bilal
Bilal Tahir is a certified technician with over 20 years of experience in computer hardware repair and IT services. He holds an NVQ Level 4 qualification in Electronics along with industry recognised certifications including Microsoft Certified Systems Engineer (MCSE, 2006) certification number 8A522B-26C1CX and Cisco Certified Network Associate (CCNA). Bilal began his career as a Network Administrator where he developed strong expertise in managing and maintaining IT systems and networks. Over time, he developed a deep interest in hardware repairs particularly component level diagnostics and repair electronics which led him to specialize in advanced motherboard and device level troubleshooting. He has worked across all major laptop and computer brands providing precise reliable repairs. With a strong technical foundation and hands on experience, Bilal is known for delivering high quality solutions for both individuals and businesses.
Write a Comment