
A Gigabyte laptop that won’t turn on can be a major inconvenience, especially if you rely on it for work, gaming, or personal use. Before you panic, know that many power-related issues can be resolved with a bit of troubleshooting. At PC Fix London, we specialize in diagnosing and repairing Gigabyte laptops, and we’re here to guide you through the process.
Common Causes of Gigabyte Laptop Power Issues
Understanding the root cause is the first step to fixing the problem. Here are the most common reasons your Gigabyte laptop might not turn on:
- Battery Problems: A dead, damaged, or improperly connected battery can prevent your laptop from turning on.
- Power Supply Issues: A faulty charger, damaged power port, or issues with the wall outlet can stop your laptop from receiving power.
- Hardware Failures: Problems with internal components like the motherboard, RAM, or hard drive can cause startup failures.
- Display Malfunctions: The laptop might be turning on, but the screen remains black due to a faulty display or graphics card.
- Overheating: Excessive heat can trigger safety mechanisms that prevent the laptop from powering on.
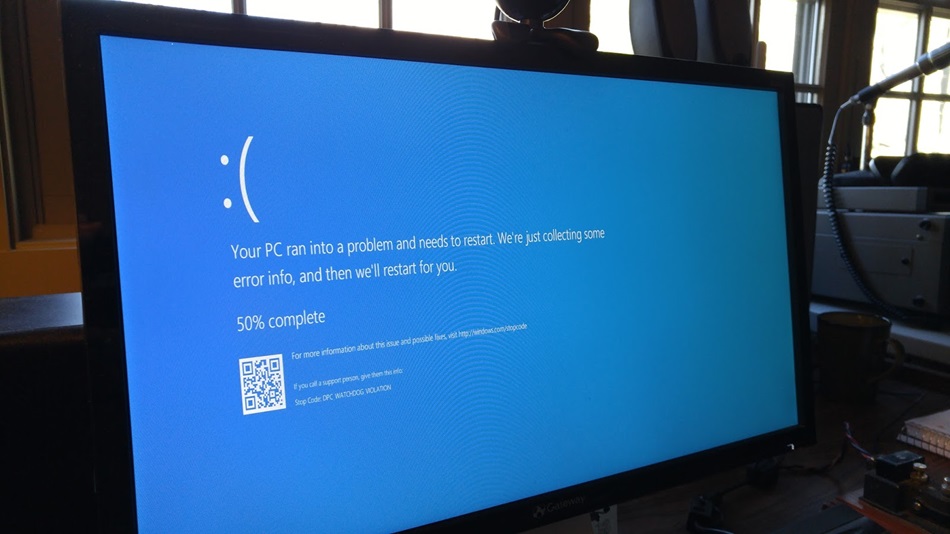
- Software Glitches: Corrupted system files or failed updates can also cause boot issues.
Step-by-Step Troubleshooting Guide
Follow these steps to diagnose and potentially fix the issue:
- Check the Power Supply
- Ensure the power adapter is securely connected to both the laptop and the wall outlet.
- Try a different outlet or power adapter to rule out issues with the power source.
- Inspect the charging port for damage or debris.
- Perform a Hard Reset
- Unplug the laptop and remove the battery (if removable).
- Hold the power button for 30 seconds to discharge residual power.
- Reconnect the power adapter and try turning it on again.
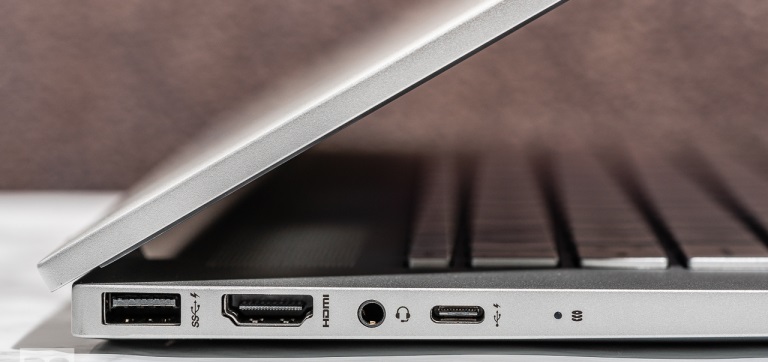
- Test with an External Monitor
- Connect your laptop to an external monitor using an HDMI or VGA cable.
- If the external display works, the issue may be with your laptop’s screen.
- Inspect the Battery
- Remove the battery and try powering the laptop with just the AC adapter.
- If it turns on, the battery may need replacement.
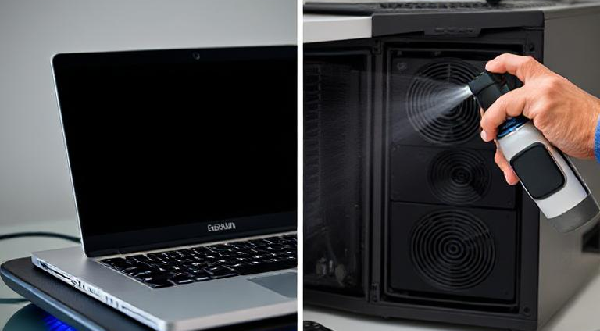
- Check for Overheating
- Let the laptop cool down for 15-30 minutes if it feels hot.
- Ensure the vents are clean and unobstructed.
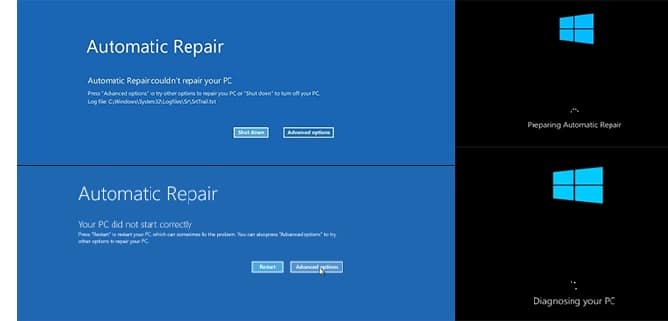
- Boot into Safe Mode
- Press the power button and repeatedly tap the F8 key to access Safe Mode.
- If successful, you can troubleshoot software issues or roll back recent updates.
- Reset the BIOS
- For advanced users: Remove the CMOS battery for a few minutes to reset the BIOS settings.
- Seek Professional Help
- If none of the above steps work, it’s time to consult a professional. At PC Fix London, we offer free diagnostics and same-day repairs for Gigabyte laptops.
Preventative Tips to Avoid Future Issues
- Use the original Gigabyte charger and avoid third-party replacements.
- Keep your laptop clean by regularly cleaning the vents and fans.
- Update your operating system and drivers to prevent software conflicts.
- Avoid using your laptop on soft surfaces that can block airflow.
Why Choose PC Fix London for Gigabyte Laptop Repairs?
- Expert Technicians: Our team specializes in Gigabyte laptop repairs.
- Genuine Parts: We use only original Gigabyte components for replacements.
- Fast Turnaround: Many repairs are completed the same day. Same-day repair available, depending on the complexity of the issue and parts availability.
- No Fix, No Fee: You only pay if we resolve the issue.
FAQs: Gigabyte Laptop Not Turning On
Q: Why won’t my Gigabyte laptop turn on even when plugged in?
A: This could indicate a problem with the power adapter, charging port, or internal components. Test with a different power adapter or seek professional diagnosis.
Q: What should I do if my Gigabyte laptop screen stays black but the power light is on?
A: This could be a display or graphics card issue. Connect your laptop to an external monitor. If the external display works, the problem is likely with your laptop’s screen.
Q: Can a dead battery cause my Gigabyte laptop not to turn on?
A: Yes, a dead or faulty battery can prevent your laptop from turning on. Remove the battery and try powering the laptop with just the AC adapter. If it turns on, the battery may need replacement.
Q: What should I do if my Gigabyte laptop turns on but freezes during startup?
A: This could indicate a software or hardware issue. Try booting into Safe Mode by pressing the F8 key during startup. If successful, troubleshoot software conflicts or perform a system restore.
Q: Can a virus prevent my Gigabyte laptop from turning on?
A: While rare, a severe virus infection can corrupt system files and prevent your laptop from booting. If you suspect a virus, boot into Safe Mode and run a full system scan using antivirus software.
Q: Why does my Gigabyte laptop turn on but show a blank screen?
A: This could be due to a faulty display, loose connections, or a graphics card issue. Connect your laptop to an external monitor to check if the problem is with the screen.
Contact Us Today
At PC Fix London, we specialize in diagnosing and repairing Gigabyte laptops. Our certified technicians use only original parts and offer fast, reliable, and affordable repair services. With our no fix, no fee policy and same-day repairs, you can trust us to get your laptop back in working order as quickly as possible.
Don’t let a power issue keep you from using your Gigabyte laptop.
No appointment is needed. You can visit our service center during working hours from Monday to Friday.
Contact us today at 020 7018 7490 or email us at contact@pcfixlondon.com for expert assistance. Whether it’s a simple fix or a major repair, we’re here to help!


Recent Comments