Motherboard failure is a common problem that people face while using laptops. After checking all other possibilities, you may find that the motherboard is the last suspect to verify why the laptop is not powering up. When any laptop has a motherboard that has failed, the only possible route for the end-user is to clean it and try to power up. This article will show you how to fix a motherboard failure on an Acer laptop.
Here are the steps you should follow to fix your motherboard failure in your Acer laptops from home.
Step 1: Take Safety Precautions
At first, you have to disconnect the power cable from the laptop. That will make sure your safety while starting the fixing process of your laptop. After that, flip the laptop upside down to remove the battery from it. If your laptop has an internally mounted battery, you can skip the step.
Step 2: Remove All Screws
Now, find the screw points of your laptop so that you can remove them. Keep the laptop upside-down until you have access to all the screw points of the laptop’s cover.
You have to unscrew the service plate’s cover of the laptop carefully. This will help you to gain access to the memory and drive as well as the wireless adapter. If your laptop requires removing all screws on the underside, then unscrew all possible screw locations. You must need to keep all the laptop’s screws in a safe location because you will need all these screws at the time of restoring your device.
Step 3: Separate Parts
After unscrewing, you can now open the laptop’s cover. Then, you have to remove the memory, storage, optical drive (if the laptop has one), and wireless adapter. There’s a chance you’ll have to deal with screws holding the drive and wireless adapters in place. You must also disconnect the wireless adapter’s black and white cables flowing away from the adapter. Be careful while you are into the laptop body because it is a little sensitive to handle a laptop’s internal chipset.
Step 4: Extract Cooling Fan
Therefore, you have to unplug all connections of your laptop from the motherboard. This includes the display, USB connectivity, cooling fan, and other chips. Remove the cooling fan by unplugging it from the motherboard. If there is any screw attached to the cooling fan, unscrew them and remove the fan.
Step 5: Use Circuit Cleaner
After that, you need to unscrew the heatsink assembly from the motherboard. And you have to use isopropyl alcohol to clean the thermal paste from the CPU, GPU, and chipset (if it’s a unified Heatpipe assembly). But suppose, for some reason, you may not have access to isopropyl alcohol or rubbing alcohol. IN that case, you can use nail polish remover instead of isopropyl alcohol.
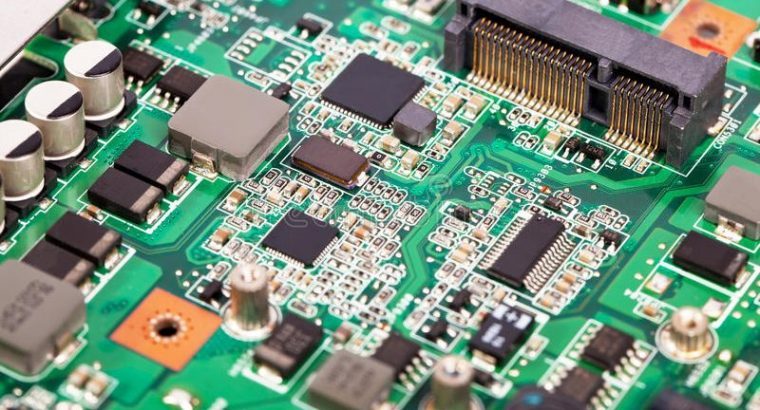
Step 6: Clean The Motherboard
You may or may not be required to remove the processor from the board, depending on the model of your Acer laptop. Next, you have to lift the processor and release all the connections. To use a circuit cleaner to clean the motherboard and wait for a while. This is the last work you need to do to fix your laptop motherboard problem.
Step 7: Reassemble
Finally, you have to restore all the connections to the laptop. For that, you need to place the processor on the motherboard. Next, you have to reapply thermal paste onto the die surfaces for your CPU, GPU, and chipset. Then remount the cooling assembly onto the motherboard of your laptop. And after that, connect the cooling fans’ power cable. Finally, you have to drop the motherboard with the processor and cooling assembly into the appropriate notch. If you’ve reassembled the laptop in the correct order, you should be able to power up and see the BIOS screen.
Final Thought
I hope following these simple steps will help you to fix the motherboard issues of your Acer laptops. As this is a common problem, you can fix it at home before asking an expert. Laptops mainly face motherboard-related issues often these days. If these simple steps cannot solve your problem, you have to replace the motherboard with a new one.
Please note that the guideline instructions provided may not always apply to the symptoms your computer is experiencing. Sometimes, symptoms or behavior can be the same, but the underlying reason or fault can be completely different.
The fastest way we can assist customers is by bringing computers to our workshop, where technicians have the tools to diagnose faults accurately. After checks, if parts are found to be faulty or damaged, we proceed to replace them with high-quality original parts.
No appointments are required; you can drop off your computer at our workshop during working hours.
If you have more queries about our laptop repair and upgrade services, please feel free to contact us at 020 7018 7490 or email us at contact@pcfixlondon.com
About Bilal
Bilal Tahir is a certified technician with over 20 years of experience in computer hardware repair and IT services. He holds an NVQ Level 4 qualification in Electronics along with industry recognised certifications including Microsoft Certified Systems Engineer (MCSE, 2006) certification number 8A522B-26C1CX and Cisco Certified Network Associate (CCNA). Bilal began his career as a Network Administrator where he developed strong expertise in managing and maintaining IT systems and networks. Over time, he developed a deep interest in hardware repairs particularly component level diagnostics and repair electronics which led him to specialize in advanced motherboard and device level troubleshooting. He has worked across all major laptop and computer brands providing precise reliable repairs. With a strong technical foundation and hands on experience, Bilal is known for delivering high quality solutions for both individuals and businesses.
Write a Comment